How do I access Return Conditions?
1.
Login to your account using the username and password provided.
2.
Hover over the Commercial Management tab then Hover over the Legal and Financial Centre and Click on Contract Management tab.

3.
Click on ENGINE CENTRE button.

4.
Select the record from the grid and Click on view icon. It will open new window.

5.
Click on Milestones tab. It will open new window.

6.
Click on the ASSET HISTORY button. It will open Asset History page in a new window.

How do I activate Return Conditions?
1.
Login to your account using the username and password provided.
2.
Hover over the Commercial Management tab then Hover over the Legal and Financial Centre and Click on Contract Management tab.

3.
Click on ENGINE CENTRE button.

4.
Select the record from the grid and Click on view icon. It will open new window.

5.
Click on Milestones tab. It will open new window.

6.
Click on the ASSET HISTORY button. It will open Asset History page in a new window.

7.
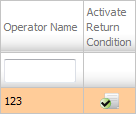
Select the record that shows activate icon under Activate Return Condition column.
8.
Click on RETURN CONDITIONS button. It will open Return Conditions in a new window.

9.
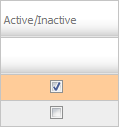
Go to Active/Inactive column in grid section. Tick the Tickbox to activate Return conditions for that row.
10.
Click on SAVE button to save your changes.

11.
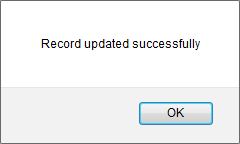
Popup window will be shown. Click on the OK button.
How do I deactivate Return Conditions?
1.
Login to your account using the username and password provided.
2.
Hover over the Commercial Management tab then Hover over the Legal and Financial Centre and Click on Contract Management tab.

3.
Click on ENGINE CENTRE button.

4.
Select the record from the grid and Click on view icon. It will open new window.

5.
Click on Milestones tab. It will open new window.

6.
Click on the ASSET HISTORY button. It will open Asset History page in a new window.

7.
Select the record that shows activate icon under Activate Return Condition column.

8.
Click on RETURN CONDITIONS button. It will open Return Conditions in a new window.

9.
Go to Active/Inactive column in grid section. Untick the Tickbox to deactivate Return conditions for that row.

10.
Click on SAVE button to save your changes.

11.
Popup window will be shown. Click on the OK button.

How do I change Return Conditions for different Operator?
1.
Login to your account using the username and password provided.
2.
Hover over the Commercial Management tab then Hover over the Legal and Financial Centre and Click on Contract Management tab.

3.
Click on ENGINE CENTRE button.

4.
Select the record from the grid and Click on view icon. It will open new window.

5.
Click on Milestones tab. It will open new window.

6.
Click on the ASSET HISTORY button. It will open Asset History page in a new window.

7.
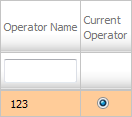
Select the record, Go to Current Operator Column and Select Radio button.
8.
It will show you one Pop up message. Click on OK button.

9.
Go to Activate Return Condition column and Click on Activate icon.

10.
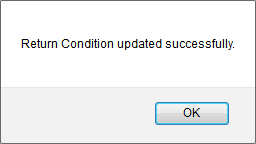
Popup window will be shown. Click on the OK button.
1.
Login to your account using the username and password provided.
2.
Hover over the Commercial Management tab then Hover over the Legal and Financial Centre and Click on Contract Management tab.

3.
Click on ENGINE CENTRE button.

4.
Select the record from the grid and Click on view icon. It will open new window.

5.
Click on Milestones tab. It will open new window.

6.
Click on the ASSET HISTORY button. It will open Asset History page in a new window.

7.
Select the record that shows activate icon under Activate Return Condition column.

8.
Click on RETURN CONDITIONS button. It will open Return Conditions in a new window.

9.
Click on AUDIT TRAIL button. It will open Audit Trail in a new window.

10.
Select filter types to filter Audit Trail Report. Like filter by keyword, filter by operations, filter by date etc.

11.
Click on FILTER button to filter Audit Trail report. It will show filtered data into grid.

1.
Login to your account using the username and password provided.
2.
Hover over the Commercial Management tab then Hover over the Legal and Financial Centre and Click on Contract Management tab.

3.
Click on ENGINE CENTRE button.

4.
Select the record from the grid and Click on view icon. It will open new window.

5.
Click on Milestones tab. It will open new window.

6.
Click on the ASSET HISTORY button. It will open Asset History page in a new window.

7.
Select the record that shows activate icon under Activate Return Condition column.

8.
Click on RETURN CONDITIONS button. It will open Return Conditions in a new window.

9.
Click on AUDIT TRAIL button. It will open Audit Trail page in a new window.

10.
Select filter types to filter Audit Trail Report. Like filter by keyword, filter by operations, filter by date, filter by client etc.

11.
Click on Export button.

12.
It will show you Popup asking whether you want to open or save file.

Note:- If you do not see this option appear it is due to access restrictions for your user account. please contact an administrator.
.png?height=120&name=flydocs@2x%20(2).png)