.png?height=120&name=flydocs@2x%20(2).png)
- Help Center
- Login
- 2-Factor Authentication
-
Home
-
Login
-
Fleet Management
- Search
- Engine Centre / Engine Module Fleet
- Aircraft Centre / Aircraft Utilisation
- Maintenance Control Centre / Manage By Date
- Repair Centre
- Reports
- Current Status
- APU Centre / APU Utilisation
- Repairs
- Link to Inventory
- Engine Centre / Engine Move Management
- Asset History
- Aircraft Centre(Sublinks)
- Maintenance Control Centre / Manage By Asset
- Document Management Centre / Manage Internal Documentation(Listing View)
- APU Centre / APU Fleet Status / APU History
- Maintenance Control Centre(Audit View)
- Components Centre / Goods in
- Document Management Centre / Manage Internal Documentation(Audit View)
- Controls
- Engine Centre(Sublinks)
- Delivery Bible/Delivery Binder/Records Library/Tech Link
- Document Management Centre / Manage Master Documentation
- Engine Centre / Engine Module Fleet / Engine Module History
- Engine Centre / Engine Fleet Status / Engine History
- Maintenance Control Centre(Listing View)
- Compile Files
- Return Project Management
- Aircraft Centre / Aircraft Fleet Status
- Structures
- Engine Centre / Engine Utilisation
- Aircraft Centre / Aircraft Fleet Status / Maintenance History
- APU Centre(Sublinks)
- APU Centre / APU Fleet Status
- Engine Centre / Engine Fleet Status
- Maintenance Control Centre / Manage By Document Type
-
Lifecycle Asset Management
- Portfolio
- Lease Terms
- Maintenance Intervals
- Maintenance Events
- LLP Management
- Redelivery Details
- Company Masters
- AM Inbox
- Exceptions To Acceptance
- Archived Users
- Type Master
- Sub Lease
- Events of Default
- Live Users
- Lease Options
- Delivery Details
- Roles Management
- Lease Management
- Users
- Organisation Masters
- Lease Rates History
- Operational Data Masters
- Thrust Reverser
- General
- Thurst Reverser
- Transaction History
- Master Approval
- Redelivery Conditions
- Control
- Utilisation
- Manage
-
Latest enhancements and updates
-
Search
-
FSCC
-
Reports
-
FAQs
-
Commercial Management
-
Masters
- Aircraft Diagram
- Return Conditions
- Transaction Documents Templates
- Delivery Bible Template
- Watermark Templates
- API Centre
- Repair Diagram Management
- Landing Gear
- Project Templates
- Authorisations and Training Records
- Technical Specification Templates
- flysearch Settings
- Contract Management
- Repair Configuration
- Master Submenu
- Category Master
- Master Types
- flysearch Types
- Export Management
- Master Internal Files
- ATA Codes
- Reason for Archive
- flydoc Templates
- Milestones
- Companies
- Manage Status List
- Document Groups
- Airworthiness Review Templates
- APU
- Mid Term Inspection Templates
- Base Location
-
Clients
-
Project Management
-
Tools
-
Users
-
Technical Management
-
Support
How do I login using 2-Factor Authentication?
1.
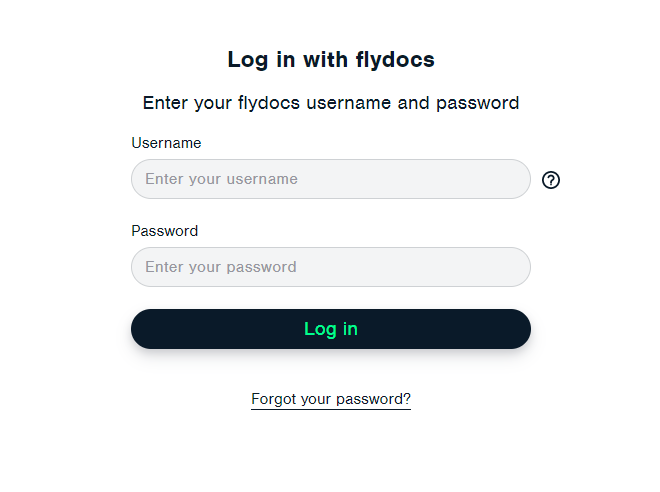
Go to Browser and Type the URL shown in the image.

2.
Login to your account using the username and password provided. A new window will open.
3.
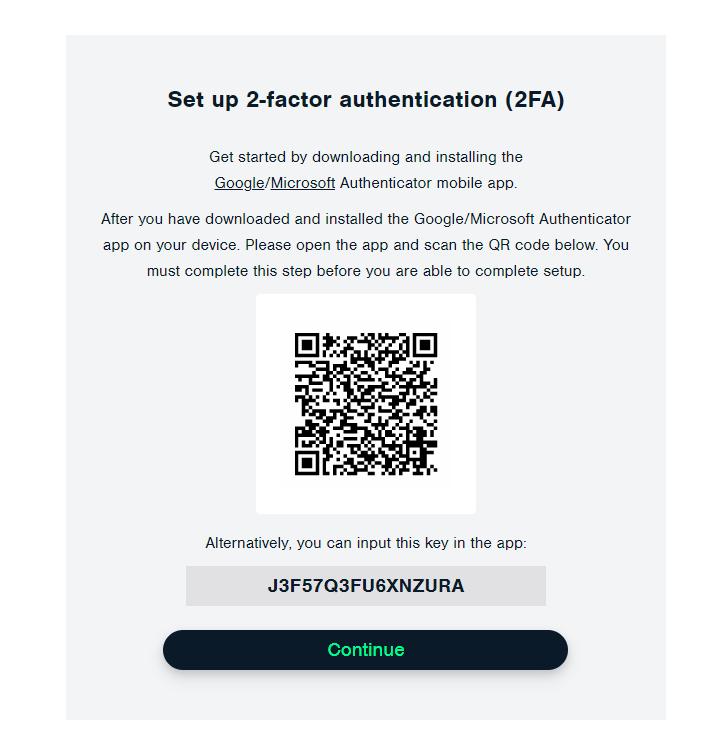
For first-time users below screen will appear which will have a code, either the user can use a code or QR code available to add an account in Google Authenticator or Microsoft Authenticator.
4.
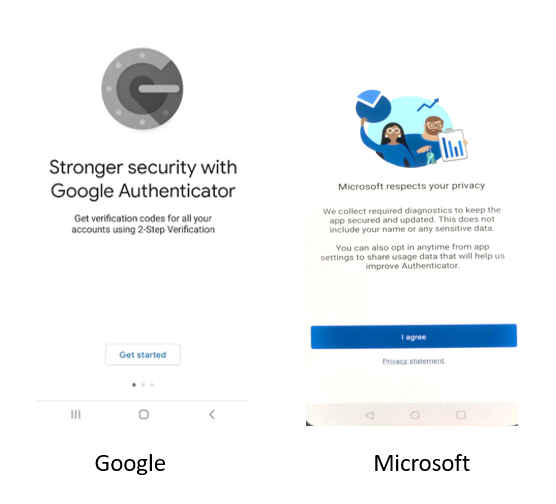
Download the Authenticator applications below -
1) �Google Authenticator: install it on your handheld device. Click on "Get Started".
OR
2) Microsoft Authenticator: install it on your handheld device. Click on "I Agree"
1) �Google Authenticator: install it on your handheld device. Click on "Get Started".
OR
2) Microsoft Authenticator: install it on your handheld device. Click on "I Agree"
5.
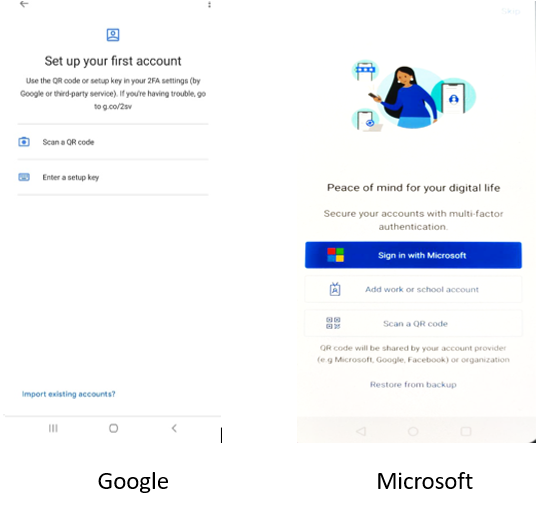
Set Up your Account by scanning the QR code on the flydocs login screen.
Note: Use scan and scan the QR code using Scan a QR code for both the Authenticator Application or enter code by clicking on the setup key with the help of the screen shown in Step 2 and add the account for Google Authenticator.
Only once does the account needs to be added, not required from the second instance.
Once the account is added Authenticator will start generating OTP at frequent intervals.
We just need to click on the Profile which was added after scanning the QR Code either by Google or Microsoft Authenticator.
6.
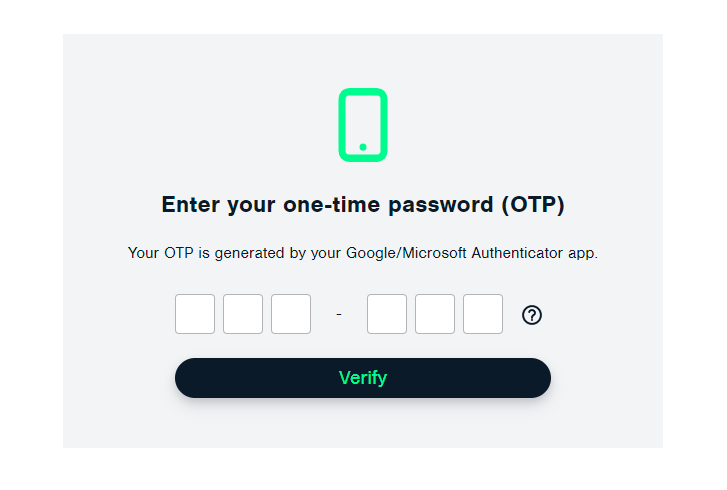
Click on CONTINUE in Step 3, a new page will open where the user can enter verification OTP.
Note: Enter the code generated in Google Authenticator OR Microsoft Authentication Application in the OTP field. After verification, the site can be accessed.
"Ensure you submit the current OTP because it refreshes every 30 seconds."
Note: Enter the code generated in Google Authenticator OR Microsoft Authentication Application in the OTP field. After verification, the site can be accessed.
"Ensure you submit the current OTP because it refreshes every 30 seconds."
FAQs
What if it shows the OTP Expired on Google Authenticator?

- Answer: You need to follow the steps below -
1.
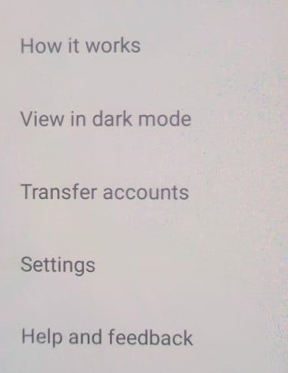
On the Google Authenticator App on your handset, Tap on the Three dots in the top right corner.
2.
Tap on the "Settings" option from the dropdown selections
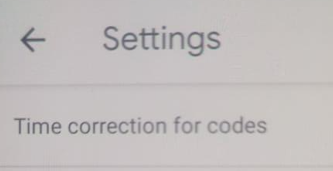
3.
Tap on the "Time correction for codes", then on the next page click on "Sync Now".
Note: After the syncing is done, once again try with OTPs.
Note: After the syncing is done, once again try with OTPs.