.png?height=120&name=flydocs@2x%20(2).png)
How do I add new document group?
1.
Login to your account using the username and password provided.
2.
Click on the Asset / Lease Management Tab.
3.
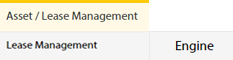
Hover on Lease Management and click on the Engine Tab.
4.
Select Client.

5.
Go to end of that row and Click on view icon. It will open new window.

6.
Select the row from the grid.

7.
Click on VIEW button. It will open new window.

8.
Click on Redelivery Conditions tab.
9.
Click on view icon which is on top right corner. It will open template in a new window.
10.
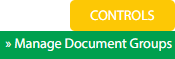
Hover on the Controls and Click on Manage Document Groups option. It will open new window.
11.
Click on ADD button.

12.
Enter Group Name.

13.
Click on SAVE button.

14.
It will open a Popup message. Click on OK.

1.
Login to your account using the username and password provided.
2.
Click on the Asset / Lease Management Tab.
3.
Hover on Lease Management and click on the Engine Tab.
4.
Select Client.
5.
Go to end of that row and Click on view icon. It will open new window.
6.
Select the row from the grid.
7.
Click on VIEW button. It will open new window.
8.
Click on Redelivery Conditions tab.
9.
Click on view icon which is on top right corner. It will open template in a new window.
10.
Hover on the Controls and Click on Manage Document Groups option. It will open new window.
11.
Select the row from the grid.
12.
Click on EDIT button.

13.
Enter Group Name.
14.
Click on SAVE button.
15.
It will open a Popup message. Click on OK.

How do I delete document group?
1.
Login to your account using the username and password provided.
2.
Click on the Asset / Lease Management Tab.
3.
Hover on Lease Management and click on the Engine Tab.
4.
Select Client.
5.
Go to end of that row and Click on view icon. It will open new window.
6.
Select the row from the grid.
7.
Click on VIEW button. It will open new window.
8.
Click on Redelivery Conditions tab.
9.
Click on view icon which is on top right corner. It will open template in a new window.
10.
Hover on the Controls and Click on Manage Document Groups option. It will open new window.
11.
Select the row from the grid.
12.
Click on DELETE button.

13.
It will open a Popup message. Click on OK.
14.
Another Popup message will be open. Click on OK.
How do I reorder document group row?
1.
Login to your account using the username and password provided.
2.
Click on the Asset / Lease Management Tab.
3.
Hover on Lease Management and click on the Engine Tab.
4.
Select Client.
5.
Go to end of that row and Click on view icon. It will open new window.
6.
Select the row from the grid.
7.
Click on VIEW button. It will open new window.
8.
Click on Redelivery Conditions tab.
9.
Click on view icon which is on top right corner. It will open template in a new window.
10.
Hover on the Controls and Click on Manage Document Groups option. It will open new window.
11.
Select the row from the grid.
12.
Click on move Icon to move your row upward/downward.

13.
It will open a Popup message. Click on OK.
How do I show a document group to main users?
1.
Login to your account using the username and password provided.
2.
Click on the Asset / Lease Management Tab.
3.
Hover on Lease Management and click on the Engine Tab.
4.
Select Client.
5.
Go to end of that row and Click on view icon. It will open new window.
6.
Select the row from the grid.
7.
Click on VIEW button. It will open new window.
8.
Click on Redelivery Conditions tab.
9.
Click on view icon which is on top right corner. It will open template in a new window.
10.
Hover on the Controls and Click on Manage Document Groups option. It will open new window.
11.
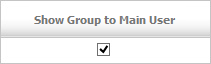
Go to the row and tick the 'Show Group to Main User' tickbox for that row.
12.
It will open a Popup message. Click on OK.
How do I hide a document group to main users?
1.
Login to your account using the username and password provided.
2.
Click on the Asset / Lease Management Tab.
3.
Hover on Lease Management and click on the Engine Tab.
4.
Select Client.
5.
Go to end of that row and Click on view icon. It will open new window.
6.
Select the row from the grid.
7.
Click on VIEW button. It will open new window.
8.
Click on Redelivery Conditions tab.
9.
Click on view icon which is on top right corner. It will open template in a new window.
10.
Hover on the Controls and Click on Manage Document Groups option. It will open new window.
11.
Go to the row and untick the 'Show Group to Main User' tickbox for that row.
12.
It will open a Popup message. Click on OK.
1.
Login to your account using your current username and password.
2.
Click on the Asset / Lease Management Tab.
3.
Hover on Lease Management and click on the Engine Tab.
4.
Select Client.
5.
Go to end of that row and Click on view icon. It will open new window.
6.
Select the row from the grid.
7.
Click on VIEW button. It will open new window.
8.
Click on Redelivery Conditions tab.
9.
Click on view icon which is on top right corner. It will open template in a new window.
10.
Hover on the Controls and Click on Manage Document Groups option. It will open new window.
11.
Click on AUDIT TRAIL button. It will open Audit Trail page in a new window.
12.
Select filter types to filter Audit Trail Report. Like filter by keyword, filter by operations, filter by date, filter by client etc.

13.
Click on FILTER button to filter Audit Trail report. It will show filtered data into grid.

1.
Login to your account using your current username and password.
2.
Click on the Asset / Lease Management Tab.
3.
Hover on Lease Management and click on the Engine Tab.
4.
Select Client.
5.
Go to end of that row and Click on view icon. It will open new window.
6.
Select the row from the grid.
7.
Click on VIEW button. It will open new window.
8.
Click on Redelivery Conditions tab.
9.
Click on view icon which is on top right corner. It will open template in a new window.
10.
Hover on the Controls and Click on Manage Document Groups option. It will open new window.
11.
Click on AUDIT TRAIL button. It will open Audit Trail page in a new window.
12.
Select filter types to filter Audit Trail Report. Like filter by keyword, filter by operations, filter by date, filter by client etc.
13.
Click on EXPORT button.

14.
It will show you Popup asking whether you want to open or save file.

Note:- If you do not see this option appear it is due to access restrictions for your user account. please contact an administrator.