.png?height=120&name=flydocs@2x%20(2).png)
How do I View Utilisation Reports in Propeller?
1.
Login to your account using your current username and password.
2.
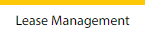
Click on the Asset / Lease Management Tab.

3.
Click on the Lease Management Tab.
4.
Click on the Propeller Tab.

5.
Select the Client in the dropdown list.

6.
Select the row data in the grid.

7.
Click on the view icon. It will open a new window.

8.
Select the row data in the grid.
9.
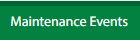
Click on the Maintenance Events tab.
10.
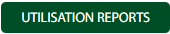
Click on the Utilisation Reports button. It will open a new window.
How do I Add Utilisation Reports in Propeller?
1.
Login to your account using your current username and password.
2.
Click on the Asset / Lease Management Tab.
3.
Click on the Lease Management Tab.
4.
Click on the Propeller Tab.
5.
Select the Client in the dropdown list.
6.
Select the row data in the grid.
7.
Click on the view icon. It will open a new window.
8.
Select the row data in the grid.
9.
Click on the Maintenance Events tab.
10.
Click on the Utilisation Reports button. It will open a new window.
11.
Click on the Add button.

12.
Select Utilisation Commencement date and Reporting Frequency field.

13.
Enter Due Date (No of days) and select the radio button of Business Days/Calendar Days.

14.
Click on the Save button.

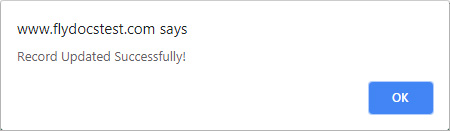
15.
It will open a Popup message. Click on OK.
Note: If "M/R Invoices Applies" and "Escalation Applies" are selected as "
yes " in the maintenance event the main page only then You can add/edit the record.
How do I Edit Utilisation Reports in Propeller?
1.
Login to your account using your current username and password.
2.
Click on the Asset / Lease Management Tab.
3.
Click on the Lease Management Tab.
4.
Click on the Propeller Tab.
5.
Select the Client in the dropdown list.
6.
Select the row data in the grid.
7.
Click on the view icon. It will open a new window.
8.
Select the row data in the grid.
9.
Click on the Maintenance Events tab.
10.
Click on the Utilisation Reports button. It will open a new window.
11.
Click on the Edit button.

12.
Select Utilisation Commencement date and Reporting Frequency field.
13.
Enter Due Date (No of days) and select the radio button of Business Days/Calendar Days.
14.
Click on the Save button.
15.
It will open a Popup message. Click on OK.
Note: If "M/R Invoices Applies" and "Escalation Applies" are selected as "
yes " in the maintenance event the main page only then You can add/edit the record.
How do I filter the Audit Trail of Utilisation Reports in Propeller?
1.
Login to your account using your current username and password.
2.
Click on the Asset / Lease Management Tab.
3.
Click on the Lease Management Tab.
4.
Click on the Propeller Tab.
5.
Select the Client in the dropdown list.
6.
Select the row data in the grid.
7.
Click on the view icon. It will open a new window.
8.
Select the row data in the grid.
9.
Click on the Maintenance Events tab.
10.
Click on the Utilisation Reports button. It will open in a new window.
11.
Click on the Audit Trail button. It will open the Audit Trail page in a new window.

12.
Select filter types to filter the Audit Trail Report.

13.
Click on the Filter button to show filtered data into the grid.

How do I export Audit Trail data of Utilisation Reports in Propeller?
1.
Login to your account using your current username and password.
2.
Click on the Asset / Lease Management Tab.
3.
Click on the Lease Management Tab.
4.
Click on the Propeller Tab.
5.
Select the Client in the dropdown list.
6.
Select the row data in the grid.
7.
Click on the view icon. It will open a new window.
8.
Select the row data in the grid.
9.
Click on the Maintenance Events tab.
10.
Click on the Utilisation Reports button. It will open in a new window.
11.
Click on the Audit Trail button. It will open the Audit Trail page in a new window.
12.
Select filter types to filter the Audit Trail Report.
13.
Click on the Filter button to show filtered data into the grid.
14.
Click on the Export button.

15.
It will show you Popup asking whether you want to open or save the file.

Note:- If you do not see this option appear it is due to access restrictions for your user account. please contact an administrator.