.png?height=120&name=flydocs@2x%20(2).png)
Table of Contents :
- How do I reorder documents?
- How do I copy documents?
- How do I merge documents?
- How do I move documents?
- How do I attach documents?
- How do I download split documents to PC?
- How do I extract to PC?
- How do I download documents to PC?
- How do I delete Documents?
- How do I view an Audit Trail of a document?
- How do I export an Audit Trail of a document?
How do I reorder documents?
1.
Login to your account using the username and password provided.
2.
Hover over the Fleet Management tab.
3.
Hover over the Maintenance Control Centre tab and Click on the Manage By Document type option.

4.
By selecting Client, Year, and Month from the drop-down options from Manage By Document type page records can be view.


5.
Scroll the page to left and click on the blue glass view icon for the required row from the grid. A new window will open.

6.
At the listing level page, click on the blue glass icon for the required row from the grid. A new document level will open.

7.
Documents can be viewed at the document level page.

8.
Hover over the Manage Documents dropdown and Click on the Reorder Documents option. It will open a new window.
9.
Reorder Document using Move Icon.

10.
Click on Save Button.

How do I copy documents?
1.
Login to your account using the username and password provided.
2.
Hover over the Fleet Management tab.
3.
Hover over the Maintenance Control Centre tab and Click on the Manage By Document type option.
4.
By selecting Client, Year, and Month from the drop-down options from Manage By Document type page records can be view.
5.
Scroll the page to left and click on the blue glass view icon for the required row from the grid. A new window will open.
6.
At the listing level page, click on the blue glass icon for the required row from the grid. A new document level will open.
7.
Documents can be viewed at the document level page.
8.
In the new window, select documents that you want to copy.
9.
Select required Attach Type from the list and other required fields.

10.
Hover over the Manage Documents dropdown and Click on the Copy option. It will open a new window.
11.
At the new window, you have a list of rows available into the grid. Select one or multiple rows where you want to copy the document.

12.
Click on the COPY button.

13.
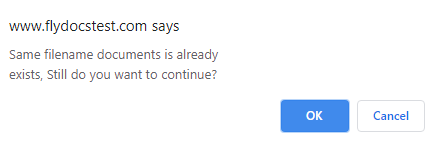
After clicking on the Copy button, If the same filename document is already present then it will show a pop-up message. If you still want to continue the copy process then click on the OK button, then the copy process will be done.
14
You get an alert message. Now Click on the OK button.
How do I merge documents?
1.
Login to your account using the username and password provided.
2.
Hover over the Fleet Management tab.
3.
Hover over the Maintenance Control Centre tab and Click on the Manage By Document type option.
4.
By selecting Client, Year, and Month from the drop-down options from Manage By Document type page records can be view.
5.
Scroll the page to left and click on the blue glass view icon for the required row from the grid. A new window will open.
6.
At the listing level page, click on the blue glass icon for the required row from the grid. A new document level will open.
7.
Documents can be viewed at the document level page.
8.
In the new window, a select minimum of two Documents to Merge Documents.
9.
Hover over the Manage Documents dropdown and Click on the Merge option. It will open a new window.
10.
Enter the file Name that you want to give to the document.

11.
click on any one option of downloading to PC and to merge the files into rows directly.

12.
click on MERGE FILES.

How do I move documents?
1.
Login to your account using the username and password provided.
2.
Hover over the Fleet Management tab.
3.
Hover over the Maintenance Control Centre tab and Click on the Manage By Document type option.
4.
By selecting Client, Year, and Month from the drop-down options from Manage By Document type page records can be view.
5.
Scroll the page to left and click on the blue glass view icon for the required row from the grid. A new window will open.
6.
At the listing level page, click on the blue glass icon for the required row from the grid. A new document level will open.
7.
Documents can be viewed at the document level page.
8.
Select the document that you want to attach.
9.
Select required Attach Type from the list and other required fields.

10.
Hover over the Manage Documents dropdown and Click on the Move option. It will open a new window.
11.
At the new window, you have a list of rows available into the grid. Select one row where you want to move the document.

12.
Click on the MOVE button.

13.
After clicking on the Move button, If the same filename document is already present then it will show a pop-up message. If you still want to continue the move process then click on the OK button, then the move process will be done.
14.
It will open document moved successfully popup. Click on the OK button.
How do I attach documents?
1.
Login to your account using the username and password provided.
2.
Hover over the Fleet Management tab.
3.
Hover over the Maintenance Control Centre tab and Click on the Manage By Document type option.
4.
By selecting Client, Year, and Month from the drop-down options from Manage By Document type page records can be view.
5.
Scroll the page to left and click on the blue glass view icon for the required row from the grid. A new window will open.
6.
At the listing level page, click on the blue glass icon for the required row from the grid. A new document level will open.
7.
Documents can be viewed at the document level page.
8.
Select the document that you want to attach.
9.
Select required Attach Type from the list and other required fields.
10.
Hover over the Manage Documents dropdown and Click on the Attach option. It will open a new window.
11.
At the new window, you have a list of rows available into the grid. Select one row where you want to attach the document.
12.
Click on the Attach button.

13.
After clicking on the Attach button, If the same filename document is already present then it will show a pop-up message. If you still want to continue the Attachment process then click on the OK button, then the attach process will be done.
14.
It will open document moved successfully popup. Click on the OK button.
How do I download split documents to PC?
1.
Login to your account using the username and password provided.
2.
Hover over the Fleet Management tab.
3.
Hover over the Maintenance Control Centre tab and Click on the Manage By Document type option.
4.
By selecting Client, Year, and Month from the drop-down options from Manage By Document type page records can be view.
5.
Scroll the page to left and click on the blue glass view icon for the required row from the grid. A new window will open.
6.
At the listing level page, click on the blue glass icon for the required row from the grid. A new document level will open.
7.
Documents can be viewed at the document level page.
8.
In the new window, select documents that you want to split.
9.
Hover to Manage Documents dropdown and Click on the Split/Extract option. It will open a new window.
10.
Hover over the SPLIT ALL PAGES button and Click on the "Download to PC" option or Save to Row.
Note :
1. If Download to PC is selected, the split files will get downloaded to PC.
2. If Save to Row is selected, the split file will get save to row.
Note :
1. If Download to PC is selected, the split files will get downloaded to PC.
2. If Save to Row is selected, the split file will get save to row.

How do I extract to PC?
1.
Login to your account using the username and password provided.
2.
Hover over the Fleet Management tab.
3.
Hover over the Maintenance Control Centre tab and Click on the Manage By Document type option.
4.
By selecting Client, Year, and Month from the drop-down options from Manage By Document type page records can be view.
5.
Scroll the page to left and click on the blue glass view icon for the required row from the grid. A new window will open.
6.
At the listing level page, click on the blue glass icon for the required row from the grid. A new document level will open.
7.
Documents can be viewed at the document level page.
8.
In the new window, select documents that you want to Extract.
9.
Hover to Manage Documents dropdown and Click on the Split/Extract option. It will open a new window.

10.
Enter the page number that you want to Extract.

11.
Click on the EXTRACT PAGES button. It will ask you to download the Extracted pages zip file.

12.
It will show you Popup asking whether you want to open or save a file.

How do I download documents to PC?
1.
Login to your account using the username and password provided.
2.
Hover over the Fleet Management tab.
3.
Hover over the Maintenance Control Centre tab and Click on the Manage By Document type option.
4.
By selecting Client, Year, and Month from the drop-down options from Manage By Document type page records can be view.
5.
Scroll the page to left and click on the blue glass view icon for the required row from the grid. A new window will open.
6.
At the listing level page, click on the blue glass icon for the required row from the grid. A new document level will open.
7.
Documents can be viewed at the document level page.
8.
In the new window, select documents that you want to download to PC.
9.
Hover over the Manage Documents dropdown and Click on Download to PC option.
10.
The option will be given to where the Documents are to be saved to.

How do I delete Documents?
1.
Login to your account using the username and password provided.
2.
Hover over the Fleet Management tab.
3.
Hover over the Maintenance Control Centre tab and Click on the Manage By Document type option.
4.
By selecting Client, Year, and Month from the drop-down options from Manage By Document type page records can be view.
5.
Scroll the page to left and click on the blue glass view icon for the required row from the grid. A new window will open.
6.
At the listing level page, click on the blue glass icon for the required row from the grid. A new document level will open.
7.
Documents can be viewed at the document level page.
8.
In the new window, select documents that you want to delete.
9.
Hover over the Manage Documents dropdown and Click on the Delete option. It will open a new window.
10.
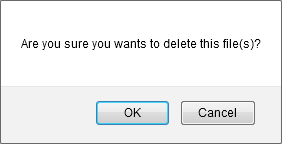
When you click on the Delete option in the Manage Document button. Popup window will open, select delete option Yes or No.
How do I view an Audit Trail of a document?
1.
Login to your account using the username and password provided.
2.
Hover over the Fleet Management tab.
3.
Hover over the Maintenance Control Centre tab and Click on the Manage By Document type option.
4.
By selecting Client, Year, and Month from the drop-down options from Manage By Document type page records can be view.
5.
Scroll the page to left and click on the blue glass view icon for the required row from the grid. A new window will open.
6.
At the listing level page, click on the blue glass icon for the required row from the grid. A new document level will open.
7.
Documents can be viewed at the document level page.
8.
Hover over the Manage Documents dropdown and Click on the Audit Trail option. It will open a new window.
9.
Select require fields to filter Audit Trail Report like filter by keyword, filter by operation, filter by date, etc.

10.
Click on the FILTER button. It will load data into the grid.

How do I export an Audit Trail of a document?
1.
Login to your account using the username and password provided.
2.
Hover over the Fleet Management tab.
3.
Hover over the Maintenance Control Centre tab and Click on the Manage By Document type option.
4.
By selecting Client, Year, and Month from the drop-down options from Manage By Document type page records can be view.
5.
Scroll the page to left and click on the blue glass view icon for the required row from the grid. A new window will open.
6.
At the listing level page, click on the blue glass icon for the required row from the grid. A new document level will open.
7.
Documents can be viewed at the document level page.
8.
Hover over the Manage Documents dropdown and Click on the Audit Trail option. It will open a new window.
9.
Select require fields to filter Audit Trail Report like filter by keyword, filter by operation, filter by date, etc.
10.
Click on the FILTER button. It will load data into the grid.

11.
Click on the EXPORT button.

12.
It will show you Popup asking whether you want to open or save a file.
