Table of Contents :
- How do I add flydocs Template?
- How do I edit flydocs Template?
- How do I delete flydocs Template?
- How do I print flydocs Template?
- How do I download flydocs Template?
- How do I view Field Audit Trail?
- How do I copy flydocs Template?
- How do I export flydocs Template?
- How do I add my Signature to flydocs Template?
- How do I undo my Signature to flydocs Template?
- How do I view Field Update Report?
- How do I export Field Update Report?
- How do I save flydocs Template as a PDF to PC?
- How do I save flydocs Template as a PDF to row?
- How do I view Audit Trail of flydocs Template?
- How do I export Audit Trail of flydocs Template?
How do I add flydocs Template?
1.
Login to your account using the username and password provided.
2.
Hover over the Fleet Management tab.

3.
Hover over the Maintenance Control Centre tab and Click on the Respective tab i.e Manage By Date, Manage By Asset, Manage By Document Type.

4.
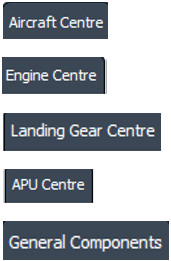
Select any centre tab that you want to open like Aircraft Centre, Engine Centre, etc.
5.
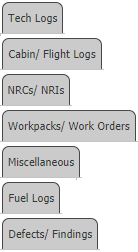
Select any Document Type that is visible to you like Miscellaneous, etc.
Note : Only Workpacks/Work Orders tab is available under Manage By Document Type.
Note : Only Workpacks/Work Orders tab is available under Manage By Document Type.
6.
Select the Client from List.
It will load listing records into grid by default.

7.
Select Listing View from the list. It will load records into grid.

8.
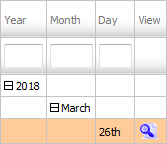
Go to end of the date record from grid that you want to access and Click on the view icon. It will open a new window. (E.g As shown in image 26th March 2018 date record is selected.)
9.
Once new window is open, Go to record that you want to access from grid.
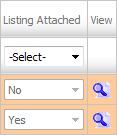
Go to Listing Attached column and Check for the below step.
Go to Listing Attached column and Check for the below step.
- If "Listing Attached" is No , Click on view icon from grid.
(Listing Attached is No: Jump to step 11 ).
- If "Listing Attached" is Yes , Click on view icon from grid.
(Listing Attached is Yes: Jump to step 10 ).
10.
Once new window is open, Go to end of the record that you want to access and Click on the view icon. It will open a new window.

11.
Hover over the Manage Documents dropdown and Click on the Add FLYdoc template option. It will open a new window.

12.
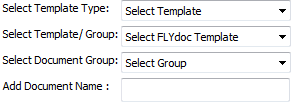
Select Template Type, Template Group and Document Group from List and Fill other relevant details.
13.
Click on CREATE button. It will open new window.

14.
Fill the required details mention in template and Click on SAVE button to save your changes.

15.
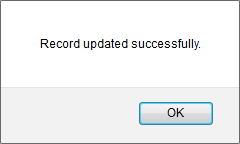
It will show you pop up message. Click on OK button to save your changes.
How do I edit FLYdoc Template?
1.
Login to your account using the username and password provided.
2.
Hover over the Fleet Management tab.

3.
Hover over the Maintenance Control Centre tab and Click on the Respective tab i.e Manage By Date, Manage By Asset, Manage By Document Type.

4.
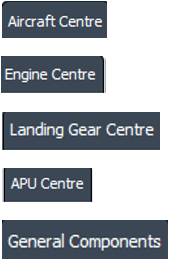
Select any centre tab that you want to open like Aircraft Centre, Engine Centre, etc.
5.
Select any Document Type that is visible to you like Miscellaneous, etc.
Note : Only Workpacks/Work Orders tab is available under Manage By Document Type.
Note : Only Workpacks/Work Orders tab is available under Manage By Document Type.

6.
Select the Client from List.
It will load listing records into grid by default.

7.
Select Listing View from the list. It will load records into grid.

8.
Go to end of the date record from grid that you want to access and Click on the view icon. It will open a new window. (E.g As shown in image 26th March 2018 date record is selected.)

9.
Once new window is open, Go to record that you want to access from grid.
Go to Listing Attached column and Check for the below step.
Go to Listing Attached column and Check for the below step.
- If "Listing Attached" is No , Click on view icon from grid.
(Listing Attached is No: Jump to step 11 ).
- If "Listing Attached" is Yes , Click on view icon from grid.
(Listing Attached is Yes: Jump to step 10 ).

10.
Once new window is open, Go to end of the record that you want to access and Click on the view icon. It will open a new window.

11.
In a new window, Select View Type from the list. By default Thumbnail view loaded.

12.
Go to Template section and Click on template name for which you want to edit FLYdoc Template. It will open new window.
13.
Fill the required details mention in template and Click on SAVE button to save your changes.

14.
It will show you Popup window
. Click on
the OK button
.
How do I delete FLYdoc Template?
1.
Login to your account using the username and password provided.
2.
Hover over the Fleet Management tab.

3.
Hover over the Maintenance Control Centre tab and Click on the Respective tab i.e Manage By Date, Manage By Asset, Manage By Document Type.

4.
Select any centre tab that you want to open like Aircraft Centre, Engine Centre, etc.

5.
Select any Document Type that is visible to you like Miscellaneous, etc.
Note : Only Workpacks/Work Orders tab is available under Manage By Document Type.
Note : Only Workpacks/Work Orders tab is available under Manage By Document Type.

6.
Select the Client from List.
It will load listing records into grid by default.

7.
Select Listing View from the list. It will load records into grid.

8.
Go to end of the date record from grid that you want to access and Click on the view icon. It will open a new window. (E.g As shown in image 26th March 2018 date record is selected.)

9.
Once new window is open, Go to record that you want to access from grid.
Go to Listing Attached column and Check for the below step.
Go to Listing Attached column and Check for the below step.
- If "Listing Attached" is No , Click on view icon from grid.
(Listing Attached is No: Jump to step 11 ).
- If "Listing Attached" is Yes , Click on view icon from grid.
(Listing Attached is Yes: Jump to step 10 ).

10.
Once new window is open, Go to end of the record that you want to access and Click on the view icon. It will open a new window.

11.
In a new window, Select View Type from the list. By default Thumbnail view loaded.

12.
Go to Template section and Tick the Tick box in front of template name.

13.
Hover over Manage Documents dropdown and Click on the Delete option.

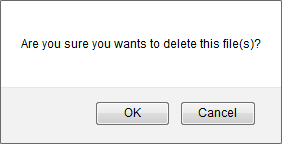
14.
It will show you Popup window. Click on the OK button.
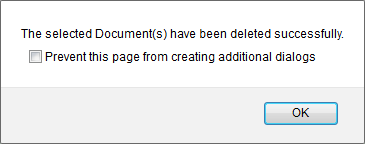
15.
It will show you Popup window. Click on the OK button.
How do I print FLYdoc Template?
1.
Login to your account using the username and password provided.
2.
Hover over the Fleet Management tab.

3.
Hover over the Maintenance Control Centre tab and Click on the Respective tab i.e Manage By Date, Manage By Asset, Manage By Document Type.

4.
Select any centre tab that you want to open like Aircraft Centre, Engine Centre, etc.

5.
Select any Document Type that is visible to you like Miscellaneous, etc.
Note : Only Workpacks/Work Orders tab is available under Manage By Document Type.
Note : Only Workpacks/Work Orders tab is available under Manage By Document Type.

6.
Select the Client from List.
It will load listing records into grid by default.

7.
Select Listing View from the list. It will load records into grid.

8.
Go to end of the date record from grid that you want to access and Click on the view icon. It will open a new window. (E.g As shown in image 26th March 2018 date record is selected.)

9.
Once new window is open, Go to record that you want to access from grid.
Go to Listing Attached column and Check for the below step.
Go to Listing Attached column and Check for the below step.
- If "Listing Attached" is No , Click on view icon from grid.
(Listing Attached is No: Jump to step 11 ).
- If "Listing Attached" is Yes , Click on view icon from grid.
(Listing Attached is Yes: Jump to step 10 ).

10.
Once new window is open, Go to end of the record that you want to access and Click on the view icon. It will open a new window.

11.
In a new window, Select View Type from the list. By default Thumbnail view loaded.

12.
Go to Template section and Click on template name for which you want to edit FLYdoc Template. It will open new window.

13.
Click on PRINT button. It will open new window. Select respective Printer and Click on PRINT button again. It will print flydocs Template.
Note: PRINT button will enable, If it is signed by user.
Note: PRINT button will enable, If it is signed by user.

How do I download FLYdocs Template?
1.
Login to your account using the username and password provided.
2.
Hover over the Fleet Management tab.

3.
Hover over the Maintenance Control Centre tab and Click on the Respective tab i.e Manage By Date, Manage By Asset, Manage By Document Type.

4.
Select any centre tab that you want to open like Aircraft Centre, Engine Centre, etc.

5.
Select any Document Type that is visible to you like Miscellaneous, etc.
Note : Only Workpacks/Work Orders tab is available under Manage By Document Type.
Note : Only Workpacks/Work Orders tab is available under Manage By Document Type.

6.
Select the Client from List.
It will load listing records into grid by default.

7.
Select Listing View from the list. It will load records into grid.

8.
Go to end of the date record from grid that you want to access and Click on the view icon. It will open a new window. (E.g As shown in image 26th March 2018 date record is selected.)

9.
Once new window is open, Go to record that you want to access from grid.
Go to Listing Attached column and Check for the below step.
Go to Listing Attached column and Check for the below step.
- If "Listing Attached" is No , Click on view icon from grid.
(Listing Attached is No: Jump to step 11 ).
- If "Listing Attached" is Yes , Click on view icon from grid.
(Listing Attached is Yes: Jump to step 10 ).

10.
Once new window is open, Go to end of the record that you want to access and Click on the view icon. It will open a new window.

11.
In a new window, Select View Type from the list. By default Thumbnail view loaded.

12.
Click on template name for which you want to download FLYdocs Template. It will open new window.

13.
Click on DOWNLOAD button.

14.
It will show you Popup asking whether you want to open or save file.

How do I view Field Audit Trail?
1.
Login to your account using the username and password provided.
2.
Hover over the Fleet Management tab.

3.
Hover over the Maintenance Control Centre tab and Click on the Respective tab i.e Manage By Date, Manage By Asset, Manage By Document Type.

4.
Select any centre tab that you want to open like Aircraft Centre, Engine Centre, etc.

5.
Select any Document Type that is visible to you like Miscellaneous, etc.
Note : Only Workpacks/Work Orders tab is available under Manage By Document Type.
Note : Only Workpacks/Work Orders tab is available under Manage By Document Type.

6.
Select the Client from List.
It will load listing records into grid by default.

7.
Select Listing View from the list. It will load records into grid.

8.
Go to end of the date record from grid that you want to access and Click on the view icon. It will open a new window. (E.g As shown in image 26th March 2018 date record is selected.)

9.
Once new window is open, Go to record that you want to access from grid.
Go to Listing Attached column and Check for the below step.
Go to Listing Attached column and Check for the below step.
- If "Listing Attached" is No , Click on view icon from grid.
(Listing Attached is No: Jump to step 11 ).
- If "Listing Attached" is Yes , Click on view icon from grid.
(Listing Attached is Yes: Jump to step 10 ).

10.
Once new window is open, Go to end of the record that you want to access and Click on the view icon. It will open a new window.

11.
In a new window, Select View Type from the list. By default Thumbnail view loaded.

12.
Go to Template Section and Click on template Name which you want to view. It will open that template in a new window.
13.
Go to any field of that template. It will enable FIELD AUDIT TRAIL button.

14.
Click on FIELD AUDIT TRAIL button. It will open Audit Trail of that field in new window.

How do I copy FLYdocs Template?
1.
Login to your account using the username and password provided.
2.
Hover over the Fleet Management tab.

3.
Hover over the Maintenance Control Centre tab and Click on the Respective tab i.e Manage By Date, Manage By Asset, Manage By Document Type.

4.
Select any centre tab that you want to open like Aircraft Centre, Engine Centre, etc.

5.
Select any Document Type that is visible to you like Miscellaneous, etc.
Note : Only Workpacks/Work Orders tab is available under Manage By Document Type.
Note : Only Workpacks/Work Orders tab is available under Manage By Document Type.

6.
Select the Client from List.
It will load listing records into grid by default.

7.
Select Listing View from the list. It will load records into grid.

8.
Go to end of the date record from grid that you want to access and Click on the view icon. It will open a new window. (E.g As shown in image 26th March 2018 date record is selected.)

9.
Once new window is open, Go to record that you want to access from grid.
Go to Listing Attached column and Check for the below step.
Go to Listing Attached column and Check for the below step.
- If "Listing Attached" is No , Click on view icon from grid.
(Listing Attached is No: Jump to step 11 ).
- If "Listing Attached" is Yes , Click on view icon from grid.
(Listing Attached is Yes: Jump to step 10 ).

10.
Once new window is open, Go to end of the record that you want to access and Click on the view icon. It will open a new window.

11.
In a new window, Select View Type from the list. By default Thumbnail view loaded.

12.
Go to Template Section and Click on template Name which you want to copy. It will open that template in a new window.

13.
Click on COPY button. It will open new window.

14.
Select Group where you want to create copy of current template.

15.
Click on CREATE button. It will open new window.

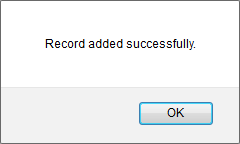
16.
It will show you Popup window. Click on the OK button.
How do I export flydoc Template?
1.
Login to your account using the username and password provided.
2.
Hover over the Fleet Management tab.

3.
Hover over the Maintenance Control Centre tab and Click on the Respective tab i.e Manage By Date, Manage By Asset, Manage By Document Type.

4.
Select any centre tab that you want to open like Aircraft Centre, Engine Centre, etc.

5.
Select any Document Type that is visible to you like Miscellaneous, etc.
Note : Only Workpacks/Work Orders tab is available under Manage By Document Type.
Note : Only Workpacks/Work Orders tab is available under Manage By Document Type.

6.
Select the Client from List.
It will load listing records into grid by default.

7.
Select Listing View from the list. It will load records into grid.

8.
Go to end of the date record from grid that you want to access and Click on the view icon. It will open a new window. (E.g As shown in image 26th March 2018 date record is selected.)

9.
Once new window is open, Go to record that you want to access from grid.
Go to Listing Attached column and Check for the below step.
Go to Listing Attached column and Check for the below step.
- If "Listing Attached" is No , Click on view icon from grid.
(Listing Attached is No: Jump to step 11 ).
- If "Listing Attached" is Yes , Click on view icon from grid.
(Listing Attached is Yes: Jump to step 10 ).

10.
Once new window is open, Go to end of the record that you want to access and Click on the view icon. It will open a new window.

11.
In a new window, Select View Type from the list. By default Thumbnail view loaded.

12.
Go to Template section and Click on template name for which you want to edit FLYdoc Template. It will open new window.

13.
Click on EXPORT button.

14.
It will show you Popup asking whether you want to open or save file.

How do I add my Signature to FLYdocs Template?
1.
Login to your account using the username and password provided.
2.
Hover over the Fleet Management tab.

3.
Hover over the Maintenance Control Centre tab and Click on the Respective tab i.e Manage By Date, Manage By Asset, Manage By Document Type.

4.
Select any centre tab that you want to open like Aircraft Centre, Engine Centre, etc.

5.
Select any Document Type that is visible to you like Miscellaneous, etc.
Note : Only Workpacks/Work Orders tab is available under Manage By Document Type.
Note : Only Workpacks/Work Orders tab is available under Manage By Document Type.

6.
Select the Client from List.
It will load listing records into grid by default.

7.
Select Listing View from the list. It will load records into grid.

8.
Go to end of the date record from grid that you want to access and Click on the view icon. It will open a new window. (E.g As shown in image 26th March 2018 date record is selected.)

9.
Once new window is open, Go to record that you want to access from grid.
Go to Listing Attached column and Check for the below step.
Go to Listing Attached column and Check for the below step.
- If "Listing Attached" is No , Click on view icon from grid.
(Listing Attached is No: Jump to step 11 ).
- If "Listing Attached" is Yes , Click on view icon from grid.
(Listing Attached is Yes: Jump to step 10 ).

10.
Once new window is open, Go to end of the record that you want to access and Click on the view icon. It will open a new window.

11.
In a new window, Select View Type from the list. By default Thumbnail view loaded.

12.
Click on template name for which you want to print FLYdocs Template. It will open new window.

13.
Once you open a Template, Click on the SIGNATURE button. It will open pop up window.
Note: You can view SIGNATURE button If you have permission to do FLYSign .
Note: You can view SIGNATURE button If you have permission to do FLYSign .

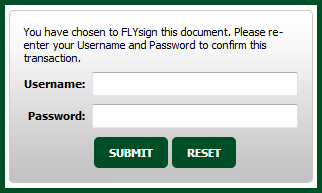
14.
Login to your account using the username and password provided.
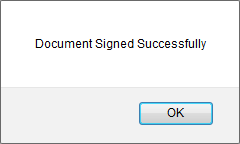
15.
It will show you Popup window. Click on the OK button.
How do I undo my Signature to FLYdocs Template?
1.
Login to your account using the username and password provided.
2.
Hover over the Fleet Management tab.

3.
Hover over the Maintenance Control Centre tab and Click on the Respective tab i.e Manage By Date, Manage By Asset, Manage By Document Type.

4.
Select any centre tab that you want to open like Aircraft Centre, Engine Centre, etc.

5.
Select any Document Type that is visible to you like Miscellaneous, etc.
Note : Only Workpacks/Work Orders tab is available under Manage By Document Type.
Note : Only Workpacks/Work Orders tab is available under Manage By Document Type.

6.
Select the Client from List.
It will load listing records into grid by default.

7.
Select Listing View from the list. It will load records into grid.

8.
Go to end of the date record from grid that you want to access and Click on the view icon. It will open a new window. (E.g As shown in image 26th March 2018 date record is selected.)

9.
Once new window is open, Go to record that you want to access from grid.
Go to Listing Attached column and Check for the below step.
Go to Listing Attached column and Check for the below step.
- If "Listing Attached" is No , Click on view icon from grid.
(Listing Attached is No: Jump to step 11 ).
- If "Listing Attached" is Yes , Click on view icon from grid.
(Listing Attached is Yes: Jump to step 10 ).

10.
Once new window is open, Go to end of the record that you want to access and Click on the view icon. It will open a new window.

11.
In a new window, Select View Type from the list. By default Thumbnail view loaded.

12.
Click on template name for which you want to print FLYdocs Template. It will open new window.
13.
Click on the UNDO SIGNATURES button. It will open new window.

14.
It will show you Popup window. Click on the OK button.
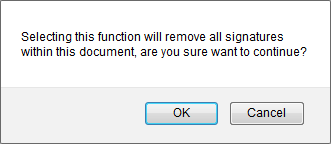
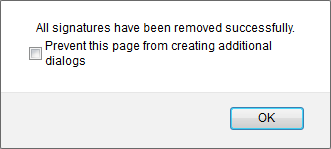
15.
It will show you Popup window. Click on the OK button.
How do I view Field Update Report?
1.
Login to your account using the username and password provided.
2.
Hover over the Fleet Management tab.

3.
Hover over the Maintenance Control Centre tab and Click on the Respective tab i.e Manage By Date, Manage By Asset, Manage By Document Type.

4.
Select any centre tab that you want to open like Aircraft Centre, Engine Centre, etc.

5.
Select any Document Type that is visible to you like Miscellaneous, etc.
Note : Only Workpacks/Work Orders tab is available under Manage By Document Type.
Note : Only Workpacks/Work Orders tab is available under Manage By Document Type.

6.
Select the Client from List.
It will load listing records into grid by default.

7.
Select Listing View from the list. It will load records into grid.

8.
Go to end of the date record from grid that you want to access and Click on the view icon. It will open a new window. (E.g As shown in image 26th March 2018 date record is selected.)

9.
Once new window is open, Go to record that you want to access from grid.
Go to Listing Attached column and Check for the below step.
Go to Listing Attached column and Check for the below step.
- If "Listing Attached" is No , Click on view icon from grid.
(Listing Attached is No: Jump to step 11 ).
- If "Listing Attached" is Yes , Click on view icon from grid.
(Listing Attached is Yes: Jump to step 10 ).

10.
Once new window is open, Go to end of the record that you want to access and Click on the view icon. It will open a new window.

11.
In a new window, Select View Type from the list. By default Thumbnail view loaded.

12.
Click on template name for which you want to print FLYdocs Template. It will open new window.

13.
Click on the FIELD UPDATE REPORT button. It will open Field Update Report in a new window.

How do I export Field Update Report?
1.
Login to your account using the username and password provided.
2.
Hover over the Fleet Management tab.

3.
Hover over the Maintenance Control Centre tab and Click on the Respective tab i.e Manage By Date, Manage By Asset, Manage By Document Type.

4.
Select any centre tab that you want to open like Aircraft Centre, Engine Centre, etc.

5.
Select any Document Type that is visible to you like Miscellaneous, etc.
Note : Only Workpacks/Work Orders tab is available under Manage By Document Type.
Note : Only Workpacks/Work Orders tab is available under Manage By Document Type.

6.
Select the Client from List.
It will load listing records into grid by default.

7.
Select Listing View from the list. It will load records into grid.

8.
Go to end of the date record from grid that you want to access and Click on the view icon. It will open a new window. (E.g As shown in image 26th March 2018 date record is selected.)

9.
Once new window is open, Go to record that you want to access from grid.
Go to Listing Attached column and Check for the below step.
Go to Listing Attached column and Check for the below step.
- If "Listing Attached" is No , Click on view icon from grid.
(Listing Attached is No: Jump to step 11 ).
- If "Listing Attached" is Yes , Click on view icon from grid.
(Listing Attached is Yes: Jump to step 10 ).

10.
Once new window is open, Go to end of the record that you want to access and Click on the view icon. It will open a new window.

11.
In a new window, Select View Type from the list. By default Thumbnail view loaded.

12.
Click on template name for which you want to print FLYdocs Template. It will open new window.

13.
Click on the FIELD UPDATE REPORT button. It will open new window.

14.
Click on EXPORT button.

15.
It will show you Popup asking whether you want to open or save file.

How do I save FLYdocs Template as a PDF to PC?
1.
Login to your account using the username and password provided.
2.
Hover over the Fleet Management tab.

3.
Hover over the Maintenance Control Centre tab and Click on the Respective tab i.e Manage By Date, Manage By Asset, Manage By Document Type.

4.
Select any centre tab that you want to open like Aircraft Centre, Engine Centre, etc.

5.
Select any Document Type that is visible to you like Miscellaneous, etc.
Note : Only Workpacks/Work Orders tab is available under Manage By Document Type.
Note : Only Workpacks/Work Orders tab is available under Manage By Document Type.

6.
Select the Client from List.
It will load listing records into grid by default.

7.
Select Listing View from the list. It will load records into grid.

8.
Go to end of the date record from grid that you want to access and Click on the view icon. It will open a new window. (E.g As shown in image 26th March 2018 date record is selected.)

9.
Once new window is open, Go to record that you want to access from grid.
Go to Listing Attached column and Check for the below step.
Go to Listing Attached column and Check for the below step.
- If "Listing Attached" is No , Click on view icon from grid.
(Listing Attached is No: Jump to step 11 ).
- If "Listing Attached" is Yes , Click on view icon from grid.
(Listing Attached is Yes: Jump to step 10 ).

10.
Once new window is open, Go to end of the record that you want to access and Click on the view icon. It will open a new window.

11.
In a new window, Select View Type from the list. By default Thumbnail view loaded.

12.
Click on template name for which you want to print FLYdocs Template. It will open new window.

13.
Hover over the GENERATE PDF dropdown and Click on the Save to PC option.

14.
It will show you Popup asking whether you want to open or save file.

How do I save FLYdocs Template as a PDF to row?
1.
Login to your account using the username and password provided.
2.
Hover over the Fleet Management tab.

3.
Hover over the Maintenance Control Centre tab and Click on the Respective tab i.e Manage By Date, Manage By Asset, Manage By Document Type.

4.
Select any centre tab that you want to open like Aircraft Centre, Engine Centre, etc.

5.
Select any Document Type that is visible to you like Miscellaneous, etc.
Note : Only Workpacks/Work Orders tab is available under Manage By Document Type.
Note : Only Workpacks/Work Orders tab is available under Manage By Document Type.

6.
Select the Client from List.
It will load listing records into grid by default.

7.
Select Listing View from the list. It will load records into grid.

8.
Go to end of the date record from grid that you want to access and Click on the view icon. It will open a new window. (E.g As shown in image 26th March 2018 date record is selected.)

9.
Once new window is open, Go to record that you want to access from grid.
Go to Listing Attached column and Check for the below step.
Go to Listing Attached column and Check for the below step.
- If "Listing Attached" is No , Click on view icon from grid.
(Listing Attached is No: Jump to step 11 ).
- If "Listing Attached" is Yes , Click on view icon from grid.
(Listing Attached is Yes: Jump to step 10 ).

10.
Once new window is open, Go to end of the record that you want to access and Click on the view icon. It will open a new window.

11.
In a new window, Select View Type from the list. By default Thumbnail view loaded.

12.
Click on template name for which you want to print FLYdocs Template. It will open new window.

13.
Hover over the GENERATE PDF dropdown and Click on the Save to Row option.

14.
It will show you Popup window. Click on the OK button.
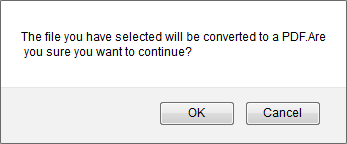
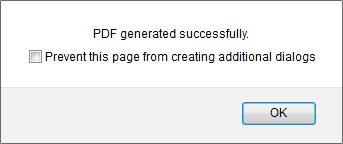
15.
It will show you Popup window. Click on the OK button.
How do I view Audit Trail of FLYdocs Template?
1.
Login to your account using the username and password provided.
2.
Hover over the Fleet Management tab.

3.
Hover over the Maintenance Control Centre tab and Click on the Respective tab i.e Manage By Date, Manage By Asset, Manage By Document Type.

4.
Select any centre tab that you want to open like Aircraft Centre, Engine Centre, etc.

5.
Select any Document Type that is visible to you like Miscellaneous, etc.
Note : Only Workpacks/Work Orders tab is available under Manage By Document Type.
Note : Only Workpacks/Work Orders tab is available under Manage By Document Type.

6.
Select the Client from List.
It will load listing records into grid by default.

7.
Select Listing View from the list. It will load records into grid.

8.
Go to end of the date record from grid that you want to access and Click on the view icon. It will open a new window. (E.g As shown in image 26th March 2018 date record is selected.)

9.
Once new window is open, Go to record that you want to access from grid.
Go to Listing Attached column and Check for the below step.
Go to Listing Attached column and Check for the below step.
- If "Listing Attached" is No , Click on view icon from grid.
(Listing Attached is No: Jump to step 11 ).
- If "Listing Attached" is Yes , Click on view icon from grid.
(Listing Attached is Yes: Jump to step 10 ).

10.
Once new window is open, Go to end of the record that you want to access and Click on the view icon. It will open a new window.

11.
In a new window, Select View Type from the list. By default Thumbnail view loaded.

12.
Go to Template section and Click on template name for which you want to edit FLYdoc Template. It will open new window.

13.
Click on AUDIT TRAIL button. It will open Audit Trail in a new window.

14.
Select filter types to filter Audit Trail Report. Like filter by keyword, filter by operations, filter by date, filter by client etc.

15.
Click on FILTER button to filter Audit Trail report. It will show filtered data into grid.

How do I export Audit Trail of FLYdocs Template?
1.
Login to your account using the username and password provided.
2.
Hover over the Fleet Management tab.

3.
Hover over the Maintenance Control Centre tab and Click on the Respective tab i.e Manage By Date, Manage By Asset, Manage By Document Type.

4.
Select any centre tab that you want to open like Aircraft Centre, Engine Centre, etc.

5.
Select any Document Type that is visible to you like Miscellaneous, etc.
Note : Only Workpacks/Work Orders tab is available under Manage By Document Type.
Note : Only Workpacks/Work Orders tab is available under Manage By Document Type.

6.
Select the Client from List.
It will load listing records into grid by default.

7.
Select Listing View from the list. It will load records into grid.

8.
Go to end of the date record from grid that you want to access and Click on the view icon. It will open a new window. (E.g As shown in image 26th March 2018 date record is selected.)

9.
Once new window is open, Go to record that you want to access from grid.
Go to Listing Attached column and Check for the below step.
Go to Listing Attached column and Check for the below step.
- If "Listing Attached" is No , Click on view icon from grid.
(Listing Attached is No: Jump to step 11 ).
- If "Listing Attached" is Yes , Click on view icon from grid.
(Listing Attached is Yes: Jump to step 10 ).

10.
Once new window is open, Go to end of the record that you want to access and Click on the view icon. It will open a new window.

11.
In a new window, Select View Type from the list. By default Thumbnail view loaded.

12.
Click on template name for which you want to view Audit trail. It will open new window.

13.
Click on AUDIT TRAIL button. It will open Audit Trail in a new window.

14.
Click on EXPORT button.

15.
It will show you Popup asking whether you want to open or save file.

Note:- If you do not see this option appear it is due to access restrictions for your user account. please contact an administrator.

.png?height=120&name=flydocs@2x%20(2).png)